By Doug Jimerson
A Christmas tree in miniature: That’s what a Norfolk Island Pine looks like.
But these appealing little plants look good in every room no matter what season it is. They are also super easy to grow, blend well in any décor, and (bonus!) they purify the air in your home. Here’s everything you need to know about selecting Norfolk Island Pines and growing them successfully for years of enjoyment.
What’s in this guide:
- What’s in a Name: A Pine That’s Not a Pine
- Choosing a Norfolk Island Pine for your Home
- Growing Norfolk Island Pines Outdoors
- Decorating with Norfolk Island Pines
What’s in a Name: A Pine That’s Not a Pine
One might think that Norfolk Island Pines are, well, pines. They look like little conifer trees, they are evergreen, have soft needles, and the word PINE is in their name. But despite all this piney evidence, Norfolk Island Pines are not actually pine trees. They are a member of the genus Araucaria and pines are the genus Pinus.But their name isn’t all misleading; they do originally come from Norfolk Island, a small island in the Pacific Ocean between Australia and New Zealand. Learn more about the surprising life of the Norfolk Island Pine.
 Choosing a Norfolk Island Pine for Your Home
Here are some tips for selecting the right Norfolk Island Pine: Big or small?
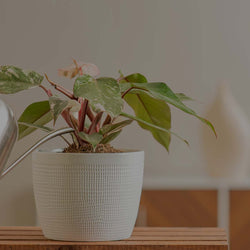
Norfolk Island Pines are available in a range of sizes to fit the decorating needs of your home. Select the size of plant for your space. You can buy Norfolk Island Pines in several pot sizes -- from those that fit nicely on a table top to larger plants that could sit on the floor. These plants are slow growing, so your plant won’t overgrow its space. But if the plant is happy, it will grow 6 feet tall or more. (Outdoors in a warm climate they can grow 40 or more feet tall.)
Touch the branches
They should feel supple, not brittle. The needles are soft -- if they aren’t, the plant hasn’t been watered enough.
Look at the color
It should be dark green. Some plants, especially those sold around the holidays, may have sparkly flecks on the branches. Avoid plants with browned leaves or branches.
Stems: Strength in numbers
Costa Farms plants multiple cuttings in a pot so your Norfolk Island Pine will grow like a little forest rather than just a single stem. While it's possible to separate each Norfolk Island pine seedling and grow them as separate plants, we don't recommend it. The process can cause root damage to the plants -- and many folks find young Norfolk Island pines look spindly by themselves. It often takes a couple of years for individual plants to fill out and look lush on their own.

Growing Norfolk Island Pines Indoors
Find the right place in your home for your Norfolk Island pine and it will flourish. Here are some things to consider:Light
Grow your plant in a medium to bright light. The less light it gets, the slower it will grow. But avoid very low-light situations. If it doesn't get enough light (natural or artificial), your Norfolk Island pine will be weak, spindly, and unattractive.
Water
Water it enough to keep the soil moist, but not wet. The roots will rot if they stand in water. If the plant stays too dry, the tips of its branches will turn brown and crispy.
Fertilizer
Norfolk Island pine once or twice during spring and summer to keep it growing well. You can fertilize more often if you want your plant to grow faster.
Pruning
If you wish to prune your Norfolk Island pine, you can remove branches any time of the year. Remove any branches/stems that have died.
Remove the pot sleeve
If your plant came with a colorful outer pot cover or sleeve, remove it when you water. Pot covers trap excess moisture around the roots and can cause roots to rot if the soil stays too moist.
Repot into a larger pot
Like most houseplants, Norfolk Island pine benefits from being repotted every couple of years as they get bigger. Your plant may not be getting the proper amount of water. Get tips for repotting houseplants.
Brown needles
If the soil is too dry, the needles will dry out and turn brown. But if the soil is too wet, the needles will dry out and turn brown. If the amount of moisture in the air drops too much, the needles will dry out. Boosting humidity with a pebble tray or small humidifier can help.
 Growing Norfolk Island Pines Outdoors
In a container You can move your Norfolk Island pines outdoors for the summer. Place it in a shaded or partly shaded spot on your patio or beneath a tree. Because it's a tropical tree, wait until all danger of frost has passed before moving it outside. Bring the plant indoors before the first frost in fall.
In the ground
In warm climates, such as Zone 10 or warmer, you can grow this beauty as a tree in your landscape. It will retain its shape and grow taller—more than 40 feet tall.
Decorating with Norfolk Island Pines
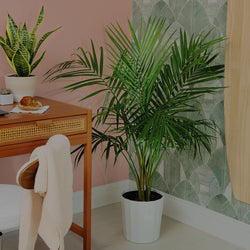
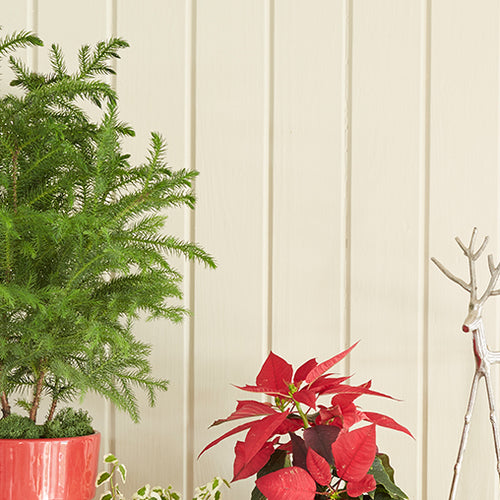
Small, young Norfolk Island pines are perfect for decorating mantles, tabletops, and desks. As this long-lived houseplant grows, it's becomes better situated as a floor plant and can be used to fill bright corners, flank furniture (such as entertainment centers), or stand alone as a stunning focal point. Learn more about decorating with this versatile plant. Seasonal Decor
Norfolk Island pines are ideal plants for holiday decor. Check out these ideas for using these versatile plants for the holidays -- and all year round.Celebrate the Seasons
Prepare for Winter
Go Green This Holiday and After
Have a Happy North Woods Holiday
Holiday Plants that Last a Long Time