By
Justin Hancock
Planting your perennials can be as simple as digging a hole, but a couple of quick and easy
steps can help your perennials get off to the best possible start. Begin by ensuring your garden bed is
clear of weeds and other debris. This is really helpful because getting rid of weeds from the beginning means you’ll
have less maintenance later on.

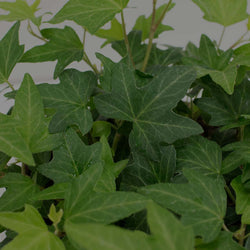
Dig the Right Hole
In horticulture, there's an old expression that you should dig a $10 hole for a $5 plant -- this one simple thing can make a big difference. When it comes to digging the hole, the hole should only be about as deep as the pot. Don’t make extra work for yourself by digging a deeper hole than you need to. The danger of a hole that’s too deep is that as the soil settles, your perennial may sink too far into the soil. This can hold your plant back, especially if you have heavy clay soil that doesn’t drain well. While the hole you dig shouldn’t be too deep, you do want it wide -- at least twice as wide as the diameter of the pot. This little step makes a difference when planting perennials because there is more loose soil around the plant roots for them to grow and stretch out. This helps your plant become established. Once you’ve dug the planting hole, place your perennial in the middle. Loosen the rootball when planting perennials, especially if they are rootbound. You can do this by gently massaging the soil and spreading out the roots so they fan outward rather than maintaining the shape of the pot. Fill the hole with the soil you used to dig it. You might sometimes see advice suggesting you fill the hole with a high-quality topsoil, but this can lead to problems, particularly if you have poor soil conditions because it creates a small zone of good soil and plant roots may not want to grow out into the surrounding soil. As a result, your plant may end up becoming stressed and rootbound while in the ground.